Jonny Winter
☕
Network engineer, coffee devotee & IT professional
Generating & displaying Meraki MV snapshots in Microsoft Teams
“While you may not be trying to catch gnomes sharing a cup of tea together, the power of a picture extends into multiple situations and use cases. You can improve site visibility by accessing a snapshot of your camera feed on-demand from a simple text message, improve video analytics capabilities with third-party API integrations, or validate a motion alert with an attached image of the trigger event in your email notification. All of this and more is possible with the new Meraki MV Snapshot API.” - Introducing the Meraki MV Snapshot API by Arianna Skirzynska on the Cisco Meraki Blog
Summary
In this blog post, I’m going to explore and demonstrate the Cisco Meraki MV Sense API Snapshot endpoint, posting the images it generates into a Microsoft Teams Channel.
My Environment
Coffee: Rich Italian Coffee from Taylors of Harrogate
Music: Blood Sugar Sex Magik by Red Hot Chili Peppers
OS: macOs Monterey v12.6.
IDE: Visual Studio Code v1.73.1
Browser: Google Chrome v107
Python: Python v3.9
Tip o’ the Hat
Cisco Meraki’s MV Sense API documentation on developer.cisco.com
ichizero’s project, specifically the HMAC code, on github.com
Microsoft Teams developer documentation on Creating Outgoing Webhooks on microsoft.com
## Prerequisites
- You will need a Meraki MV Smart Camera for this project and an MV Sense license. At time of writing 10 MV Sense licenses are given to every Meraki Dashboard organisation.
- A free Microsoft Azure account will be used for an Azure App Service. Download the Azure App Service extension for VS Code and sign in as explained here.
- You will need a Microsoft Teams account.
Let’s Begin
<NOTE>: Instead of re-inventing the wheel and explaining things that have been well defined by someone else, I have included links next to some words/technologies/acronyms/protocols that I feel could proove useful to those not yet ‘in the know’. </NOTE>
PIP & Workspace
For this project, you will need to have installed (either via virtual environment or locally) Flask & Requests. All other libraries are standard in Python 3. Within VS Code you will need to open a folder - create a folder for this project and open it up. Within here we will need two files - requirements.txt and app.py. For the requirements.txt file, paste the below but replace the versions used for your system - you can get these versions by running the command pip freeze in a terminal window.
Flask==2.2.2
requests==2.25.1
Azure App Service
Within VS Code we will create a new App Service. For this project we will utilise the free tier. To create an application that we will later deploy Python code to, do the following -
- Open the Azure Extension on the left hand side within VS Code. Expand RESOURCES and your subscription of choice.
- Right click App Services and click Create New Web App… (Advanced).
- VS Code will prompt you to enter the following in order -
- A unique name for your app, I used meraki-teams-snapshots.
- An existing or new resource group, I created a new one called meraki-teams-snapshots-rg.
- The runtime stack, select Python 3.10 if you have it availible.
- A location for the app service, I used UK South.
- An existing or new app service plan, I created a new one called meraki-teams-snapshots-asp.
- The pricing tier, I used Free (F1) for this project.
- (Optional) The application insights resource for the app. I skipped this.
Once created, your app service will take a few minutes to provision within Microsoft Azure. Note that your app name will be https://unique-app-name.azurewebsites.net - you will need to note this for later.
Microsoft Teams
We will be generating outgoing webhooks from a Microsoft Teams Team and recieving responses back with images in them. A Microsoft Teams Team is required, and they are pretty simple to set up if you haven’t already got one you want to use for this project. Within Teams, locate the Team and follow the following link to create an outgoing webhook endpoint. When creating this, specify the unique app name URL generated above in the Callback URL field. The name will be the @ name for the bot, I specified MV Snapshot as my name. Stop once you have generated and saved your security token.
Environmental Variables
Before we get to the Python code, we need to get a few environmental variables set up. I go into the process of how to create environmental variables here.
- If you haven’t already, get yourself a Meraki API key. This is outlined here. I use the value ‘merakiApiKey’ for the code below.
- Once you’ve done this for your Meraki API key, do the same for your organizationId - you can locate this/these by performing a GET request to the /organizations API endpoint as outlined here. I use the value ‘organizationId’ for the code below.
- For the final environmental variable, we need to store the Microsoft Teams security token you generated in the last section. I use the value ‘teamsSecurityToken’.
At this point you will need to close & reopent VS Code to ensure that the environmental variables are present and usable.
The last thing to do with the environmental variables we have created for our local system is to perform the same configuration within the App Service environment. To do this -
- Open the VS Code Azure extension, expand RESOURCES, your subscription, App Services, your new App Service, and finally Applicaiton Settings.
- Right click Application Settings at the top and select New application setting. You will need to specify each of the three environmental variables above one at a time, value then variable.
Python Code
The following code is all that is required to get the application running. Copy & paste the following into the app.py file we created earlier. I have written some text below the code section that explains certain lines/blocks of code within the .py file.
import requests
import os
import time
import hashlib
import hmac
import base64
from flask import Flask, Request, request, jsonify
app = Flask(__name__)
headers = {
"Accept":"application/json",
"Content-Type":"application/json",
"X-Cisco-Meraki-API-Key":os.environ.get("merakiApiKey")
}
baseUrl = "https://api.meraki.com/api/v1"
organizationId = os.environ.get("organizationId")
teamsSecurityToken = base64.b64decode(os.environ.get("teamsSecurityToken").encode('utf-8'))
def getSerial(mvName):
while True:
try:
response = requests.get(url=f"{baseUrl}/organizations/{organizationId}/devices", headers=headers)
if response.status_code == 200:
for device in response.json():
if device["name"].lower() == mvName.lower():
return True, device["serial"]
return False, "Name not found"
elif response.status_code == 429:
time.sleep(int(response.headers["Retry-After"]))
else:
return False, response
except:
break
return False, 'An unknown error occured.'
def getSnapshot(serial):
while True:
try:
response = requests.post(url=f"{baseUrl}/devices/{serial}/camera/generateSnapshot", headers=headers)
if response.status_code == 202:
return True, response.json()
elif response.status_code == 429:
time.sleep(int(response.headers["Retry-After"]))
else:
return False, response
except:
break
return False, 'An unknown error occured.'
def is_request_hmac_valid(request: Request):
actual = request.headers.get('Authorization').replace("HMAC ", "")
expected_hmac = hmac.new(teamsSecurityToken, request.data, hashlib.sha256)
expected = base64.b64encode(expected_hmac.digest()).decode()
if actual == expected:
return True
app.logger.info('Invalid HMAC')
return False
def build_message(snapshotResponse, username):
payload = {
"type": "message",
"attachments": [
{
"contentType": "application/vnd.microsoft.card.adaptive",
"content": {
"type": "AdaptiveCard",
"version": "1.4",
"body": [
{
"type": "Image",
"url": snapshotResponse["url"]
},
{
"type": "TextBlock",
"text": f"{username}, {snapshotResponse['expiry'].replace('T', ' ')}"
}
],
"actions": [
{
"type": "Action.OpenUrl",
"title": "Image URL",
"url": snapshotResponse["url"]
}
]
}
}
]
}
return jsonify(payload)
@app.route('/message', methods=['POST'])
def messages():
if is_request_hmac_valid(request):
body = request.json
print(body)
newText = body["text"].replace("\n", "").replace(" ").split("</at>")
if newText[1][0] == " ":
mvCameraName = newText[1][1:]
else:
mvCameraName = newText[1]
print(mvCameraName)
merakiMvLocatorSuccess, response = getSerial(mvCameraName)
if merakiMvLocatorSuccess == False:
return response, 400
merakiMvSnapshotSuccess, response = getSnapshot("Q2JV-LBNW-BEU4")
if merakiMvSnapshotSuccess == False:
return response, 400
return build_message(response, body["from"]["name"]), 200
else:
return "Invalid request", 400
if __name__ == "__main__":
app.run(host=("0.0.0.0"), port=int(5000), use_reloader=False, debug=True)
Deploy to Azure
At this point it would be worth running the code locally to see that you’ve entered the environmental variables correctly, and if it runs and you see no errors we are good to deploy to Azure.
The process of how to deploy a Python Flask App Service via VS Code is outlined here, however I have written out the steps that I take below.
- Open the Azure extension within VS Code, expand RESOURCES, your subscription, App Services, and locate your new App Service.
- Right click the App Service you created and select Deploy to Azure.
VS Code will now send the requirements.txt and app.py files to your App Service and create your application. It will take ~5 minutes.
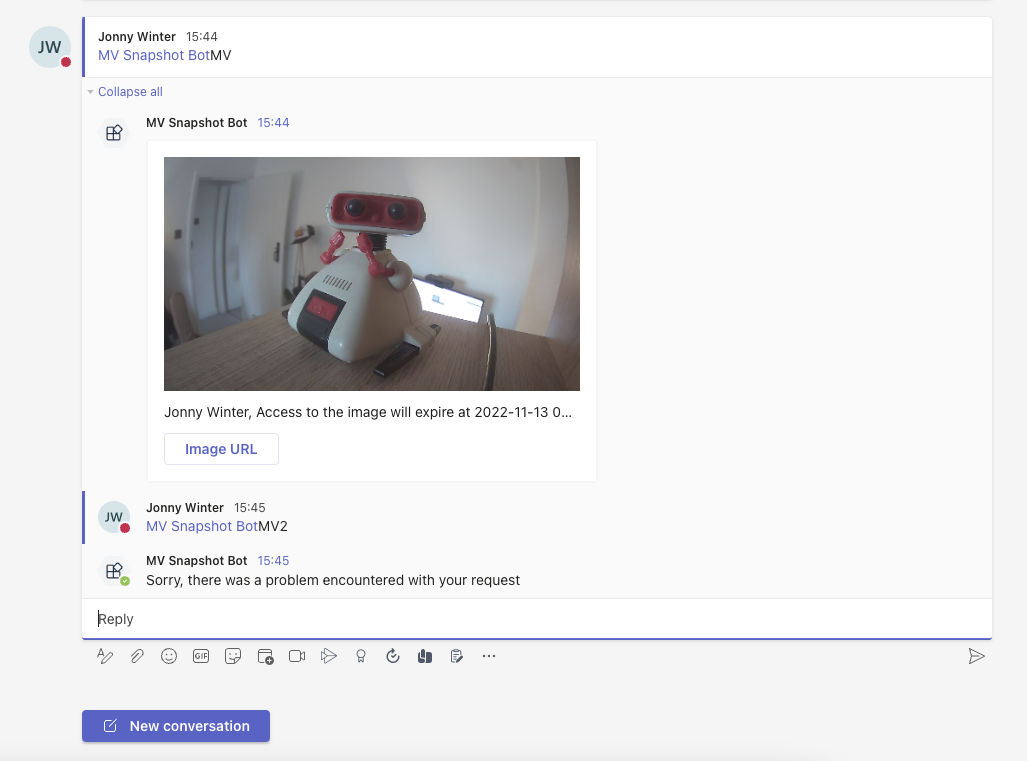
Success!
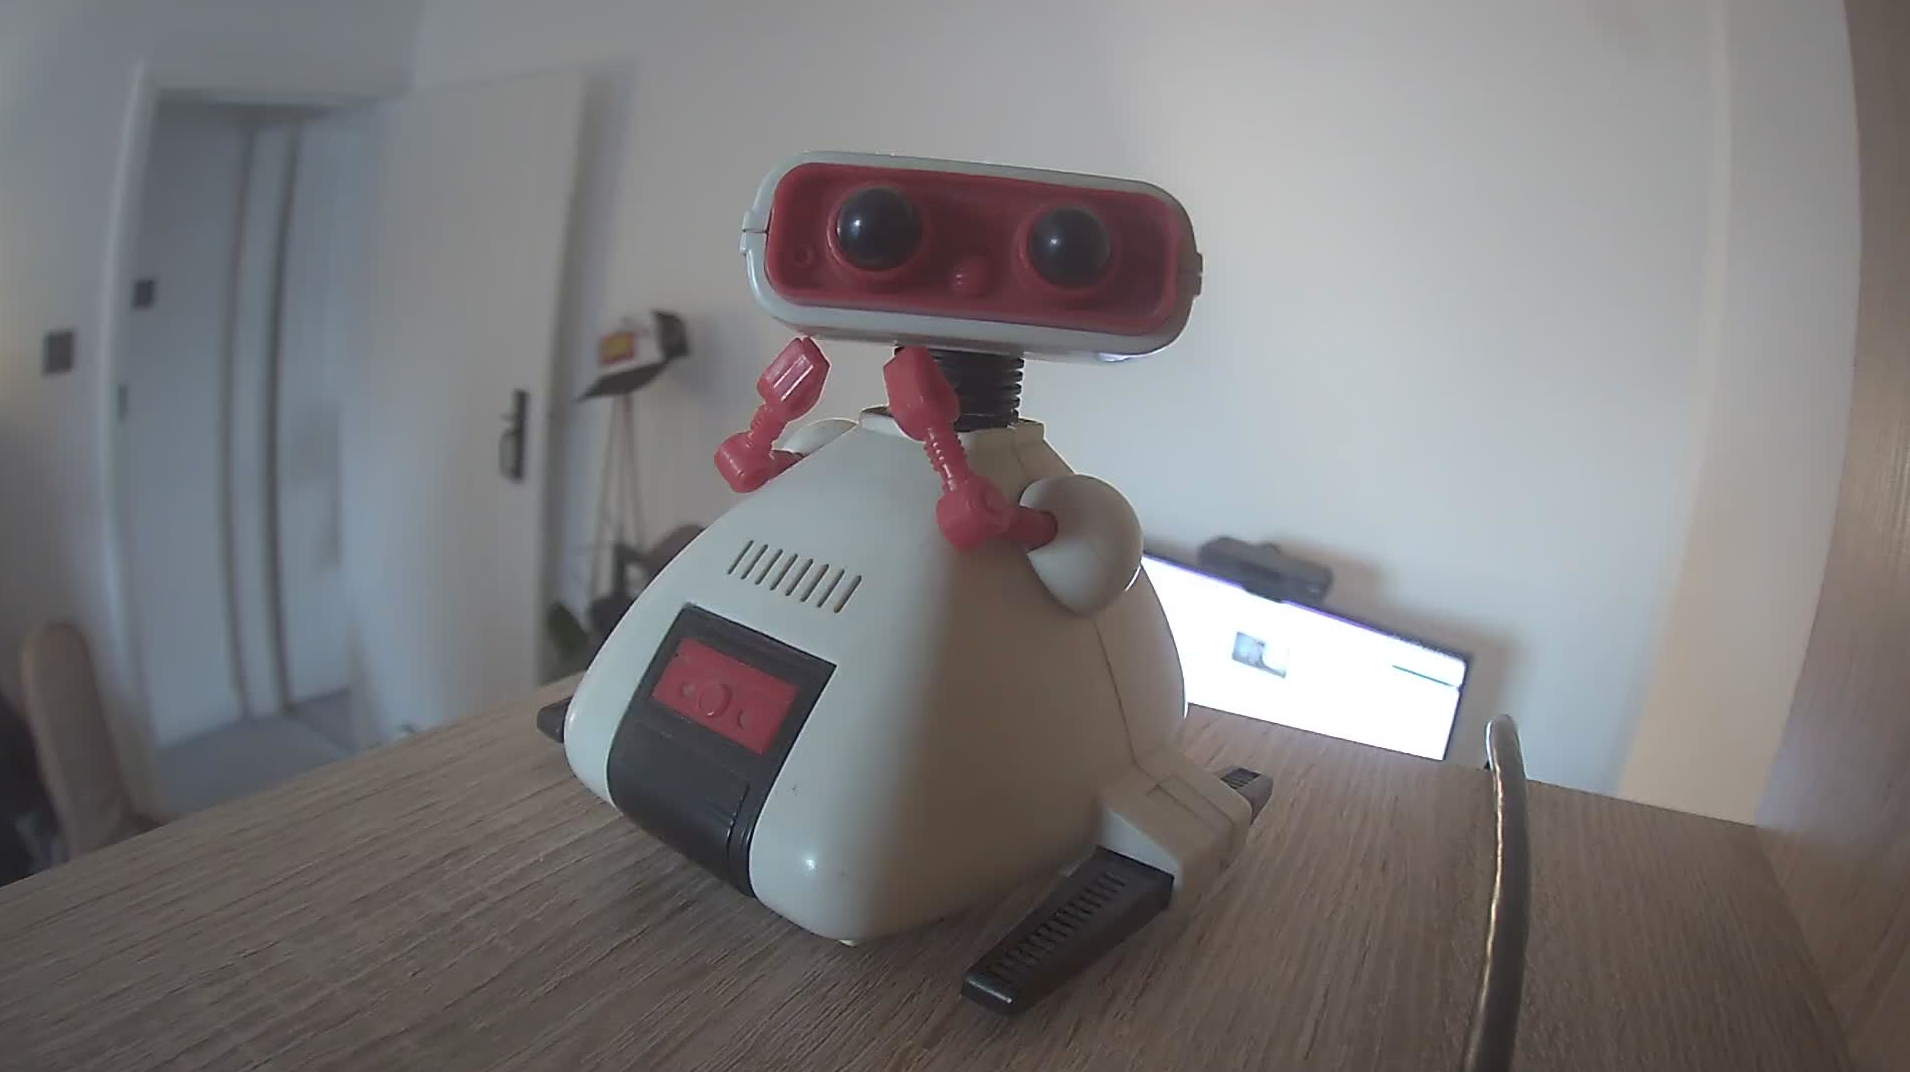
Open up your Microsoft Teams Team and type @ followed by your outgoing webhook name and the name of your Meraki MV camera. You should see a message like the below. For point of reference, I’ve included what you would see if you typed in the name of an MV camera that didn’t exist; in my environment MV is the name of my camera - MV2 doesn’t exist.
Happy scripting!
Written on November 13th, 2022 by Jonny Winter